Creating Your First Survey
Create your first AI-powered survey in Surva.ai. Learn how to generate questions, customize design and logic, and use surveys for feedback, testimonials, reviews, and churn reduction.
Introduction
Surva.ai makes it super easy to build surveys that collect meaningful feedback from your customers. You can start from our template libraries for NPS, CES, Ecommerce, or SaaS surveys or use AI to automatically generate questions tailored to your goals.
Primary Use Cases for Surva.ai
Surva.ai can be used for a wide range of feedback, review, and testimonial workflows. Below are the most common ways customers use surveys in the platform:
- Post-Purchase Feedback Surveys
Automatically collect feedback from customers after checkout on Shopify or other e-commerce sites. Use these surveys to measure satisfaction, identify product issues, and learn how to improve the buying experience. - Customer Satisfaction (CSAT) and NPS Surveys
Send one-question surveys that measure customer sentiment and loyalty. Track Net Promoter Score (NPS) trends over time and identify promoters you can invite to share testimonials. - Capturing Google, G2, and Capterra Reviews for Positive NPS Results
When customers leave a high NPS score, Surva.ai can automatically display follow-up links to Google, G2, or Capterra to encourage public reviews. This helps you build verified social proof on third-party platforms without offering paid incentives or discounts, ensuring compliance with review platform policies. - Testimonial and Review Collection
Convert happy customers into public advocates by asking for testimonials at the right time. Responses can automatically populate your Wall of Love or be featured in marketing materials and product pages. - Churn and Retention Surveys
Use targeted surveys during subscription cancellations to understand why customers leave and offer actions such as pause, discount, or downgrade. Integrations with Stripe and other billing systems make this fully automated. - Feature and Product Feedback
Collect input on new product ideas, features, or updates. These surveys help prioritize roadmap decisions based on real customer data. - Pre-Sale or Lead Qualification Surveys
Embed short surveys on your website to capture visitor intent, qualify leads, or segment prospects before a live chat or demo. - Employee or Partner Feedback
Gather internal feedback, onboarding satisfaction, or partner input using private surveys that stay within your organization.
Simply choose a template or enter the goals of your survey, and our AI will generate the perfect survey to capture the details needed to achieve your survey goals. One-click and you’re done.
This guide explains how to create a new survey, adjust its content, and design it for your brand in six simple steps.
Step 1. Create a New Survey
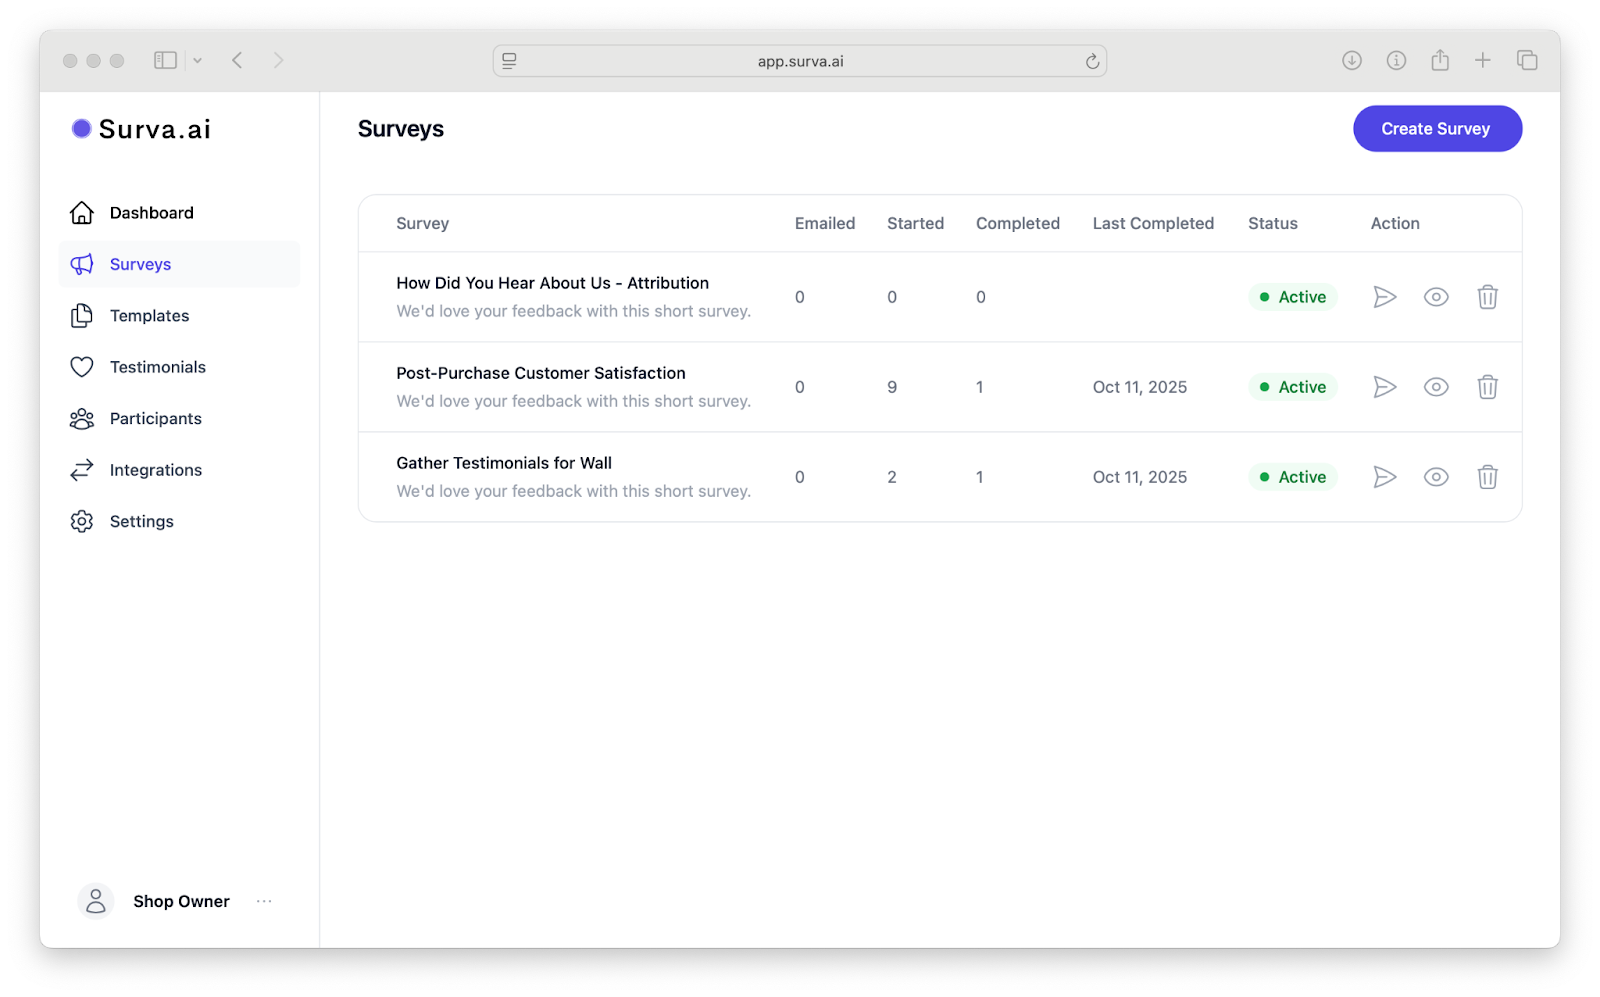
After signing in to Surva.ai, go to the left-hand navigation menu and click Surveys or choose the Create Survey button on the top-right side of your Dashboard or Surveys page.
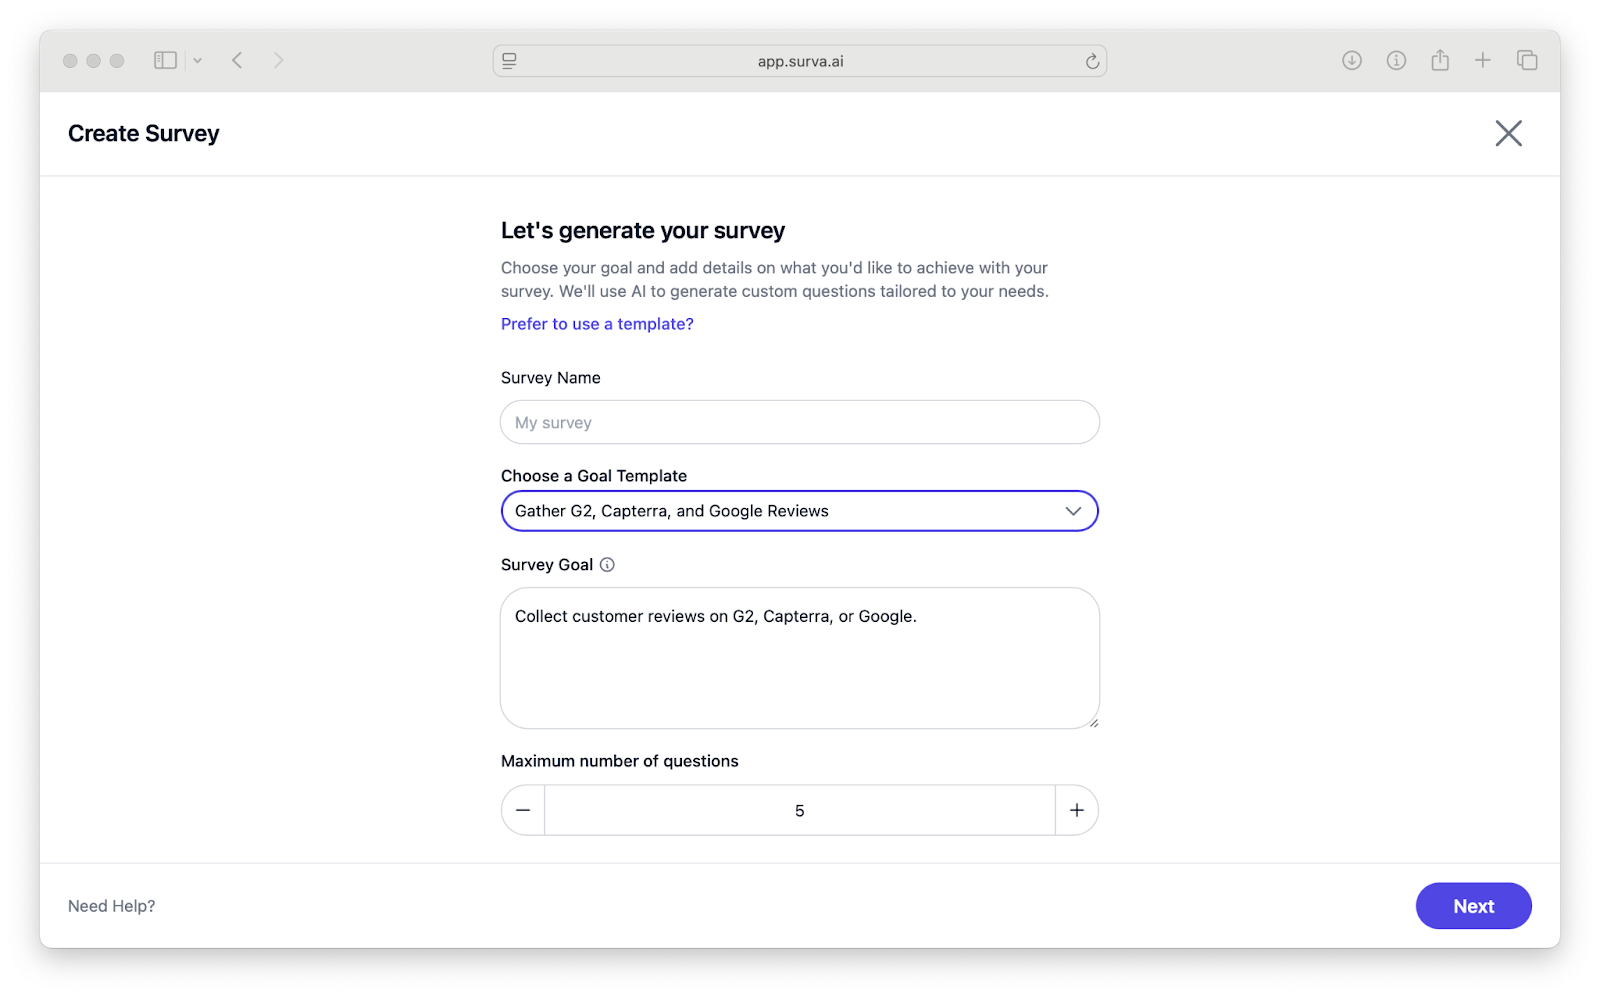
You will be asked whether to start with a Survey Name and an optional Goal Template. The goal templates are used to pre-populate the survey goals field to help you formulate the survey text for the AI that will generate your survey.
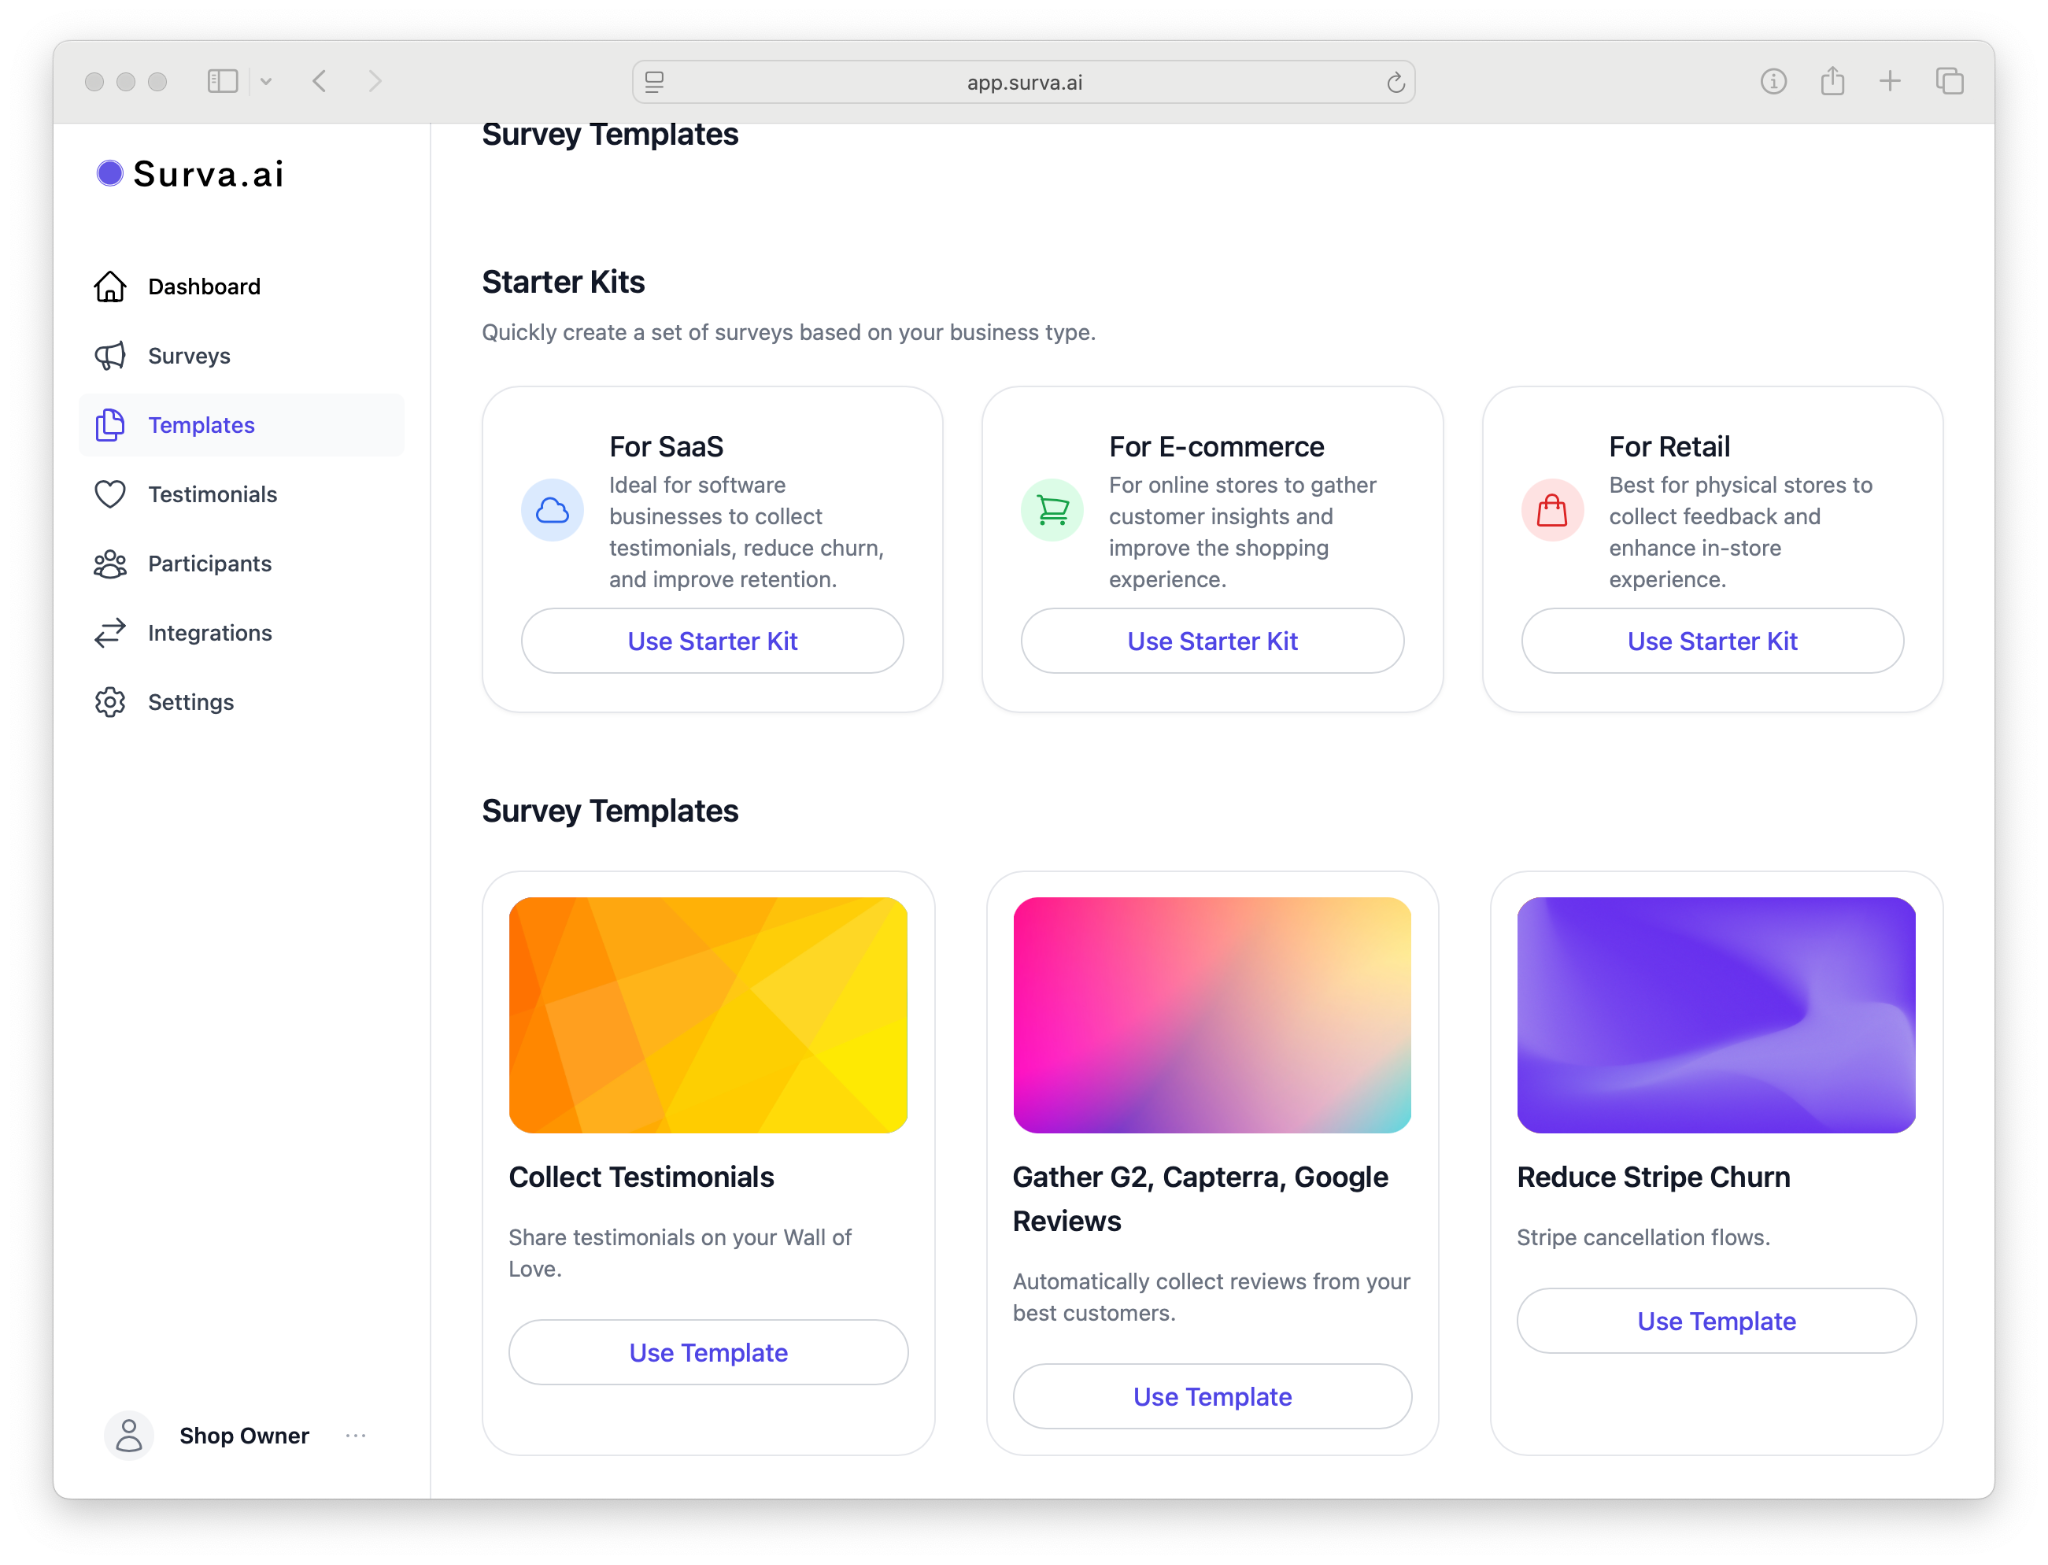
Optionally, you can click the Prefer to use a template to choose from our library of pre-build and purpose built surveys.
Step 2. Describe Your Survey Goal
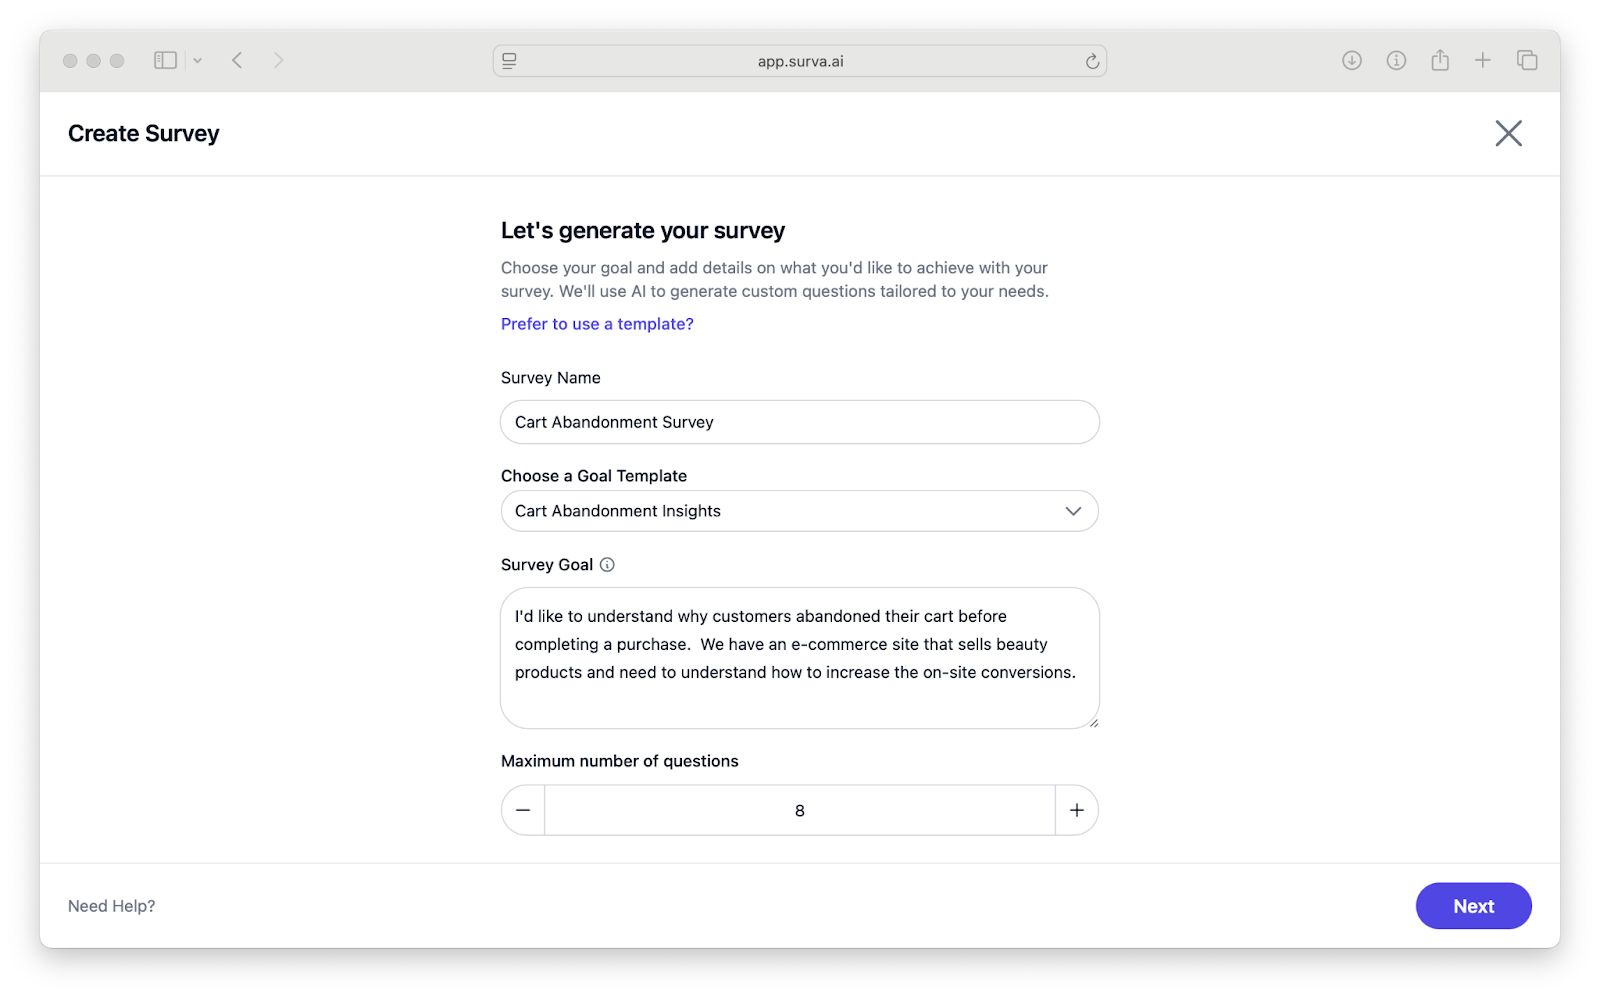
If you want Surva.ai to draft questions for you automatically, enter as detailed a description as you like and suggest the maximum number of questions you’d like to include in your survey.
For example, you might type “I want to understand why customers cancel” or “I want to collect testimonials from happy customers.” Click Next and Surva.ai will create a draft survey with suggested questions and response options. The generated survey appears immediately in the survey builder, ready for editing.
Step 3. Review and Edit Questions in the Survey Builder
Within the builder, review each question and adjust the language to fit your tone. You can edit text directly by clicking into any question field. To change the question type, open the dropdown menu beside it and select from options such as single choice, multiple choice, rating scale, free text, or NPS. To rearrange questions, drag and drop them into the desired order using the handle on the left. You can also delete any question by clicking the trash icon next to it, or add a new one at the bottom using Add Question. You can then enter the type of question or questions you’d like to generate and the AI will create them for you.

Step 4. Apply Survey Logic and Conditional Flow
To make your survey more dynamic, you can control what respondents see based on their answers.
To apply logic flows to your surveys, click on the lighting bolt icon on the top right of any question. A modal will popup that allows you to enter condition logic for that question flow.
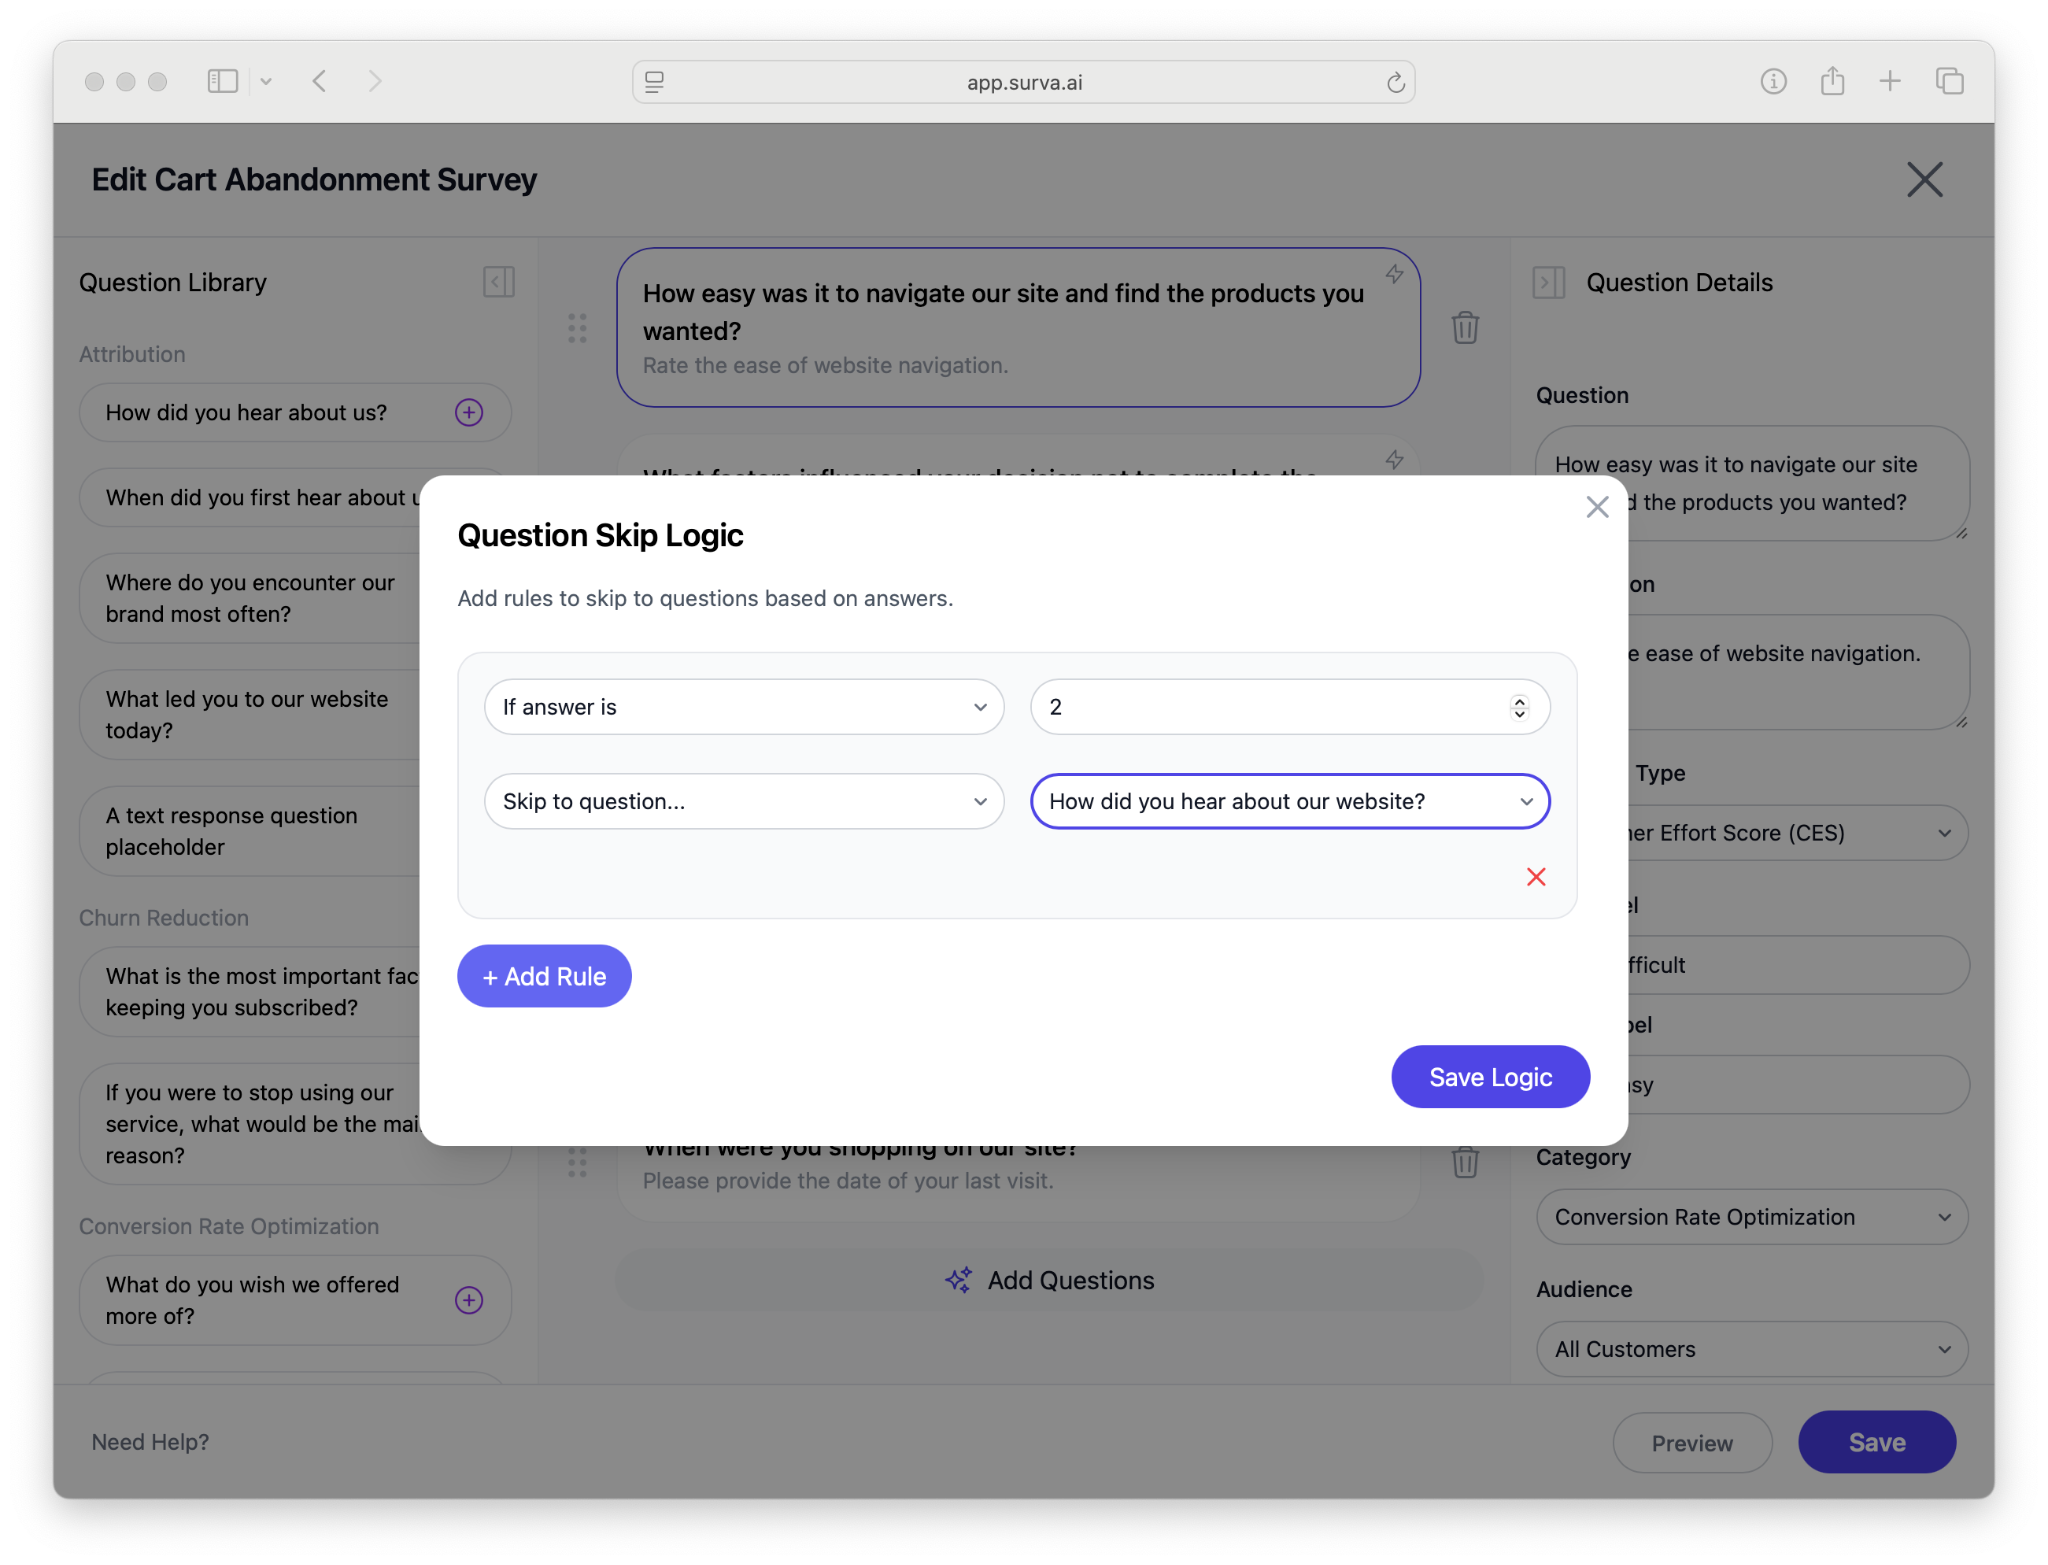
Here you can set rules such as “If answer equals X, skip to Question 5” or “If answer contains Y, end the survey.” Surva.ai will automatically validate these conditions as you save them. Use logic to simplify your survey and personalize each participant’s experience.
Step 5. Customize Design and Branding
Once you save your survey questions, you can now set up your design and settings. Choose button text, brand colors, and a logo to include on your survey.
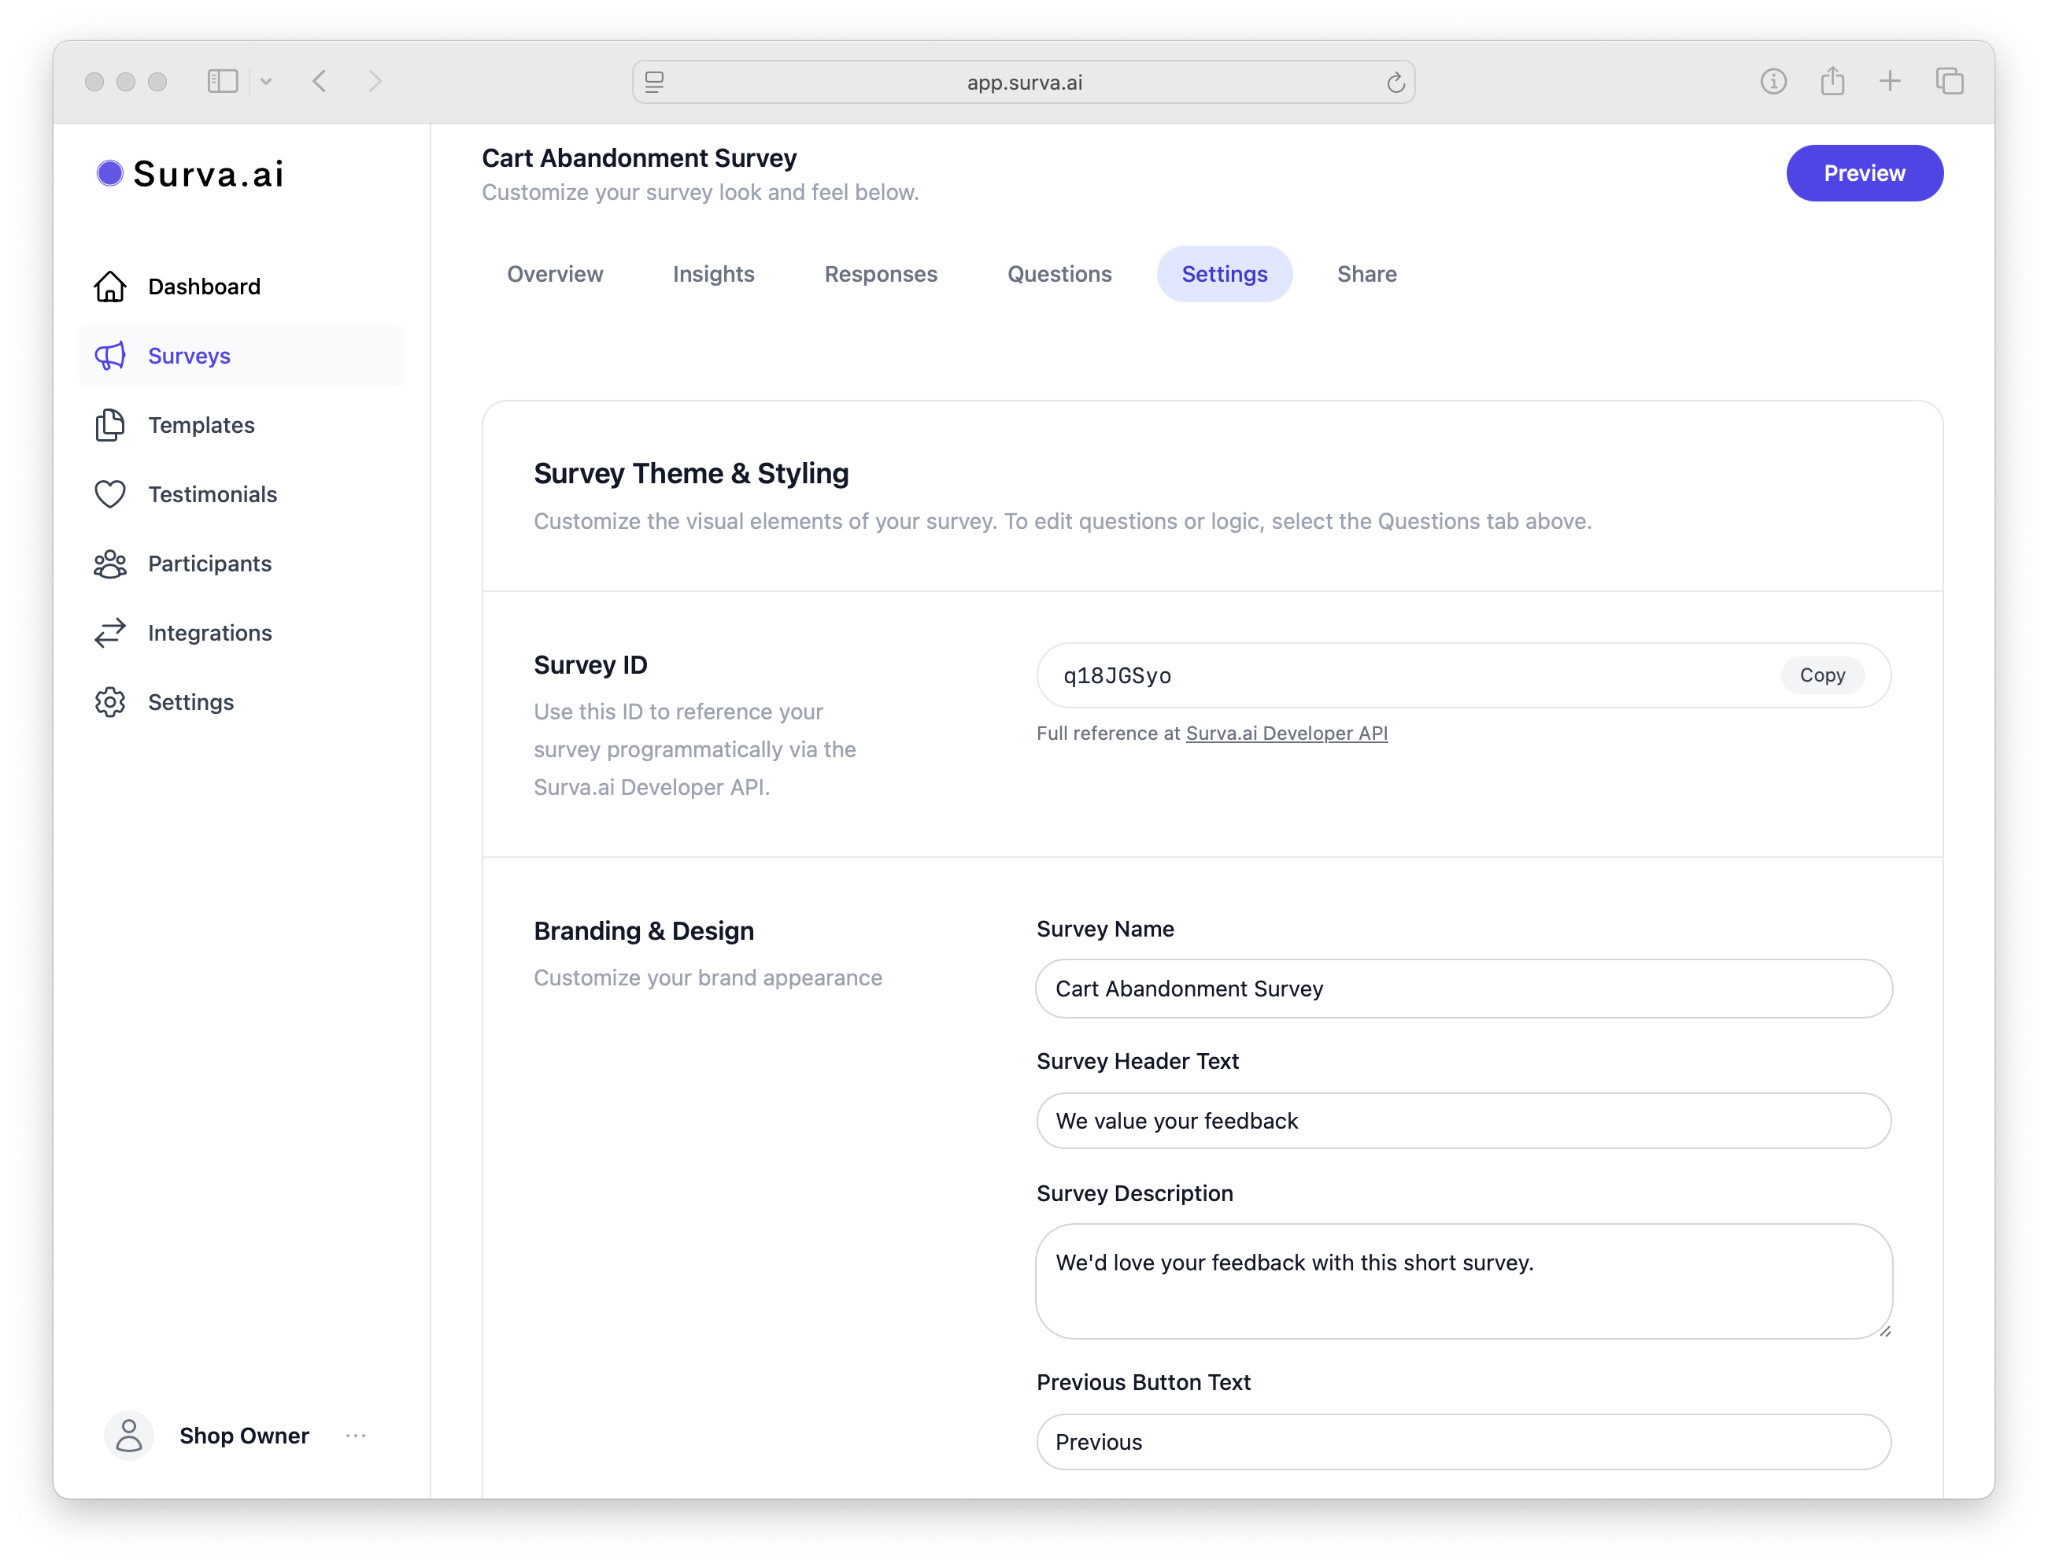
Once you’re satisfied, click Save.
Step 6. Save and Preview
When your questions and design are complete, click Save in the bottom-right corner. Then choose Preview to open a live version in a new tab. The preview allows you to test question flow, logic rules, and visual layout exactly as your customers will experience it. Make sure each logic rule works correctly and that all buttons and fields appear as expected before publishing.
Collecting Survey Responses with Surva.ai
Once you’ve built your survey you’re ready to collect responses. Head over to the Share tab to see sharing options for your surveys.

We have multiple ways to send or embed your surveys include website widgets, standalone urls, email sending, and embedding in Shopify.
For emailing your customers surveys, you can easily set up your own email address to send from with our integrations with Google Workspace and Microsoft Outlook - so the surveys will always send from your own email addresses. This allows you to have full control over the sending domain, spam reduction best practices, and control exactly where your surveys are sent from.
Lastly, we have a full developers API to trigger surveys automatically within your workflows when it makes the most sense. For instance, after closing a chat, send a survey, or 5 days after a purchase, send a survey. The API is fully dynamic to support transnational surveys.
Troubleshooting
If your survey preview doesn’t load or changes aren’t visible, confirm that you’ve saved your latest edits. If questions appear out of order, verify that the drag-and-drop order was saved by refreshing the page. For logic issues, recheck each condition under the Logic tab and ensure target question numbers still exist after any deletions.
What’s Next
Now that your first survey is ready, you can share it or automate its delivery. Continue to Creating a Wall of Love to turn feedback into testimonials, or see Sending Surveys Automatically After Purchase to set up post-purchase triggers.
