Creating a Wall of Love
See how to create a Wall of Love and add your best Testimonials to it.
Setting up your first Wall of Love
The Testimonials Wall of Love feature in Surva.ai helps you turn your authentic customer feedback into a public page or website embed that highlights what people love about your brand. A Wall of Love can display testimonials collected from your surveys, share positive NPS comments, and link to external reviews on platforms such as Google, G2, or Capterra. In this article, we’ll detail how to create, customize, and publish testimonials on your own Wall of Love and then how to embed your wall of love on your website.
Step 1. Collect Testimonials
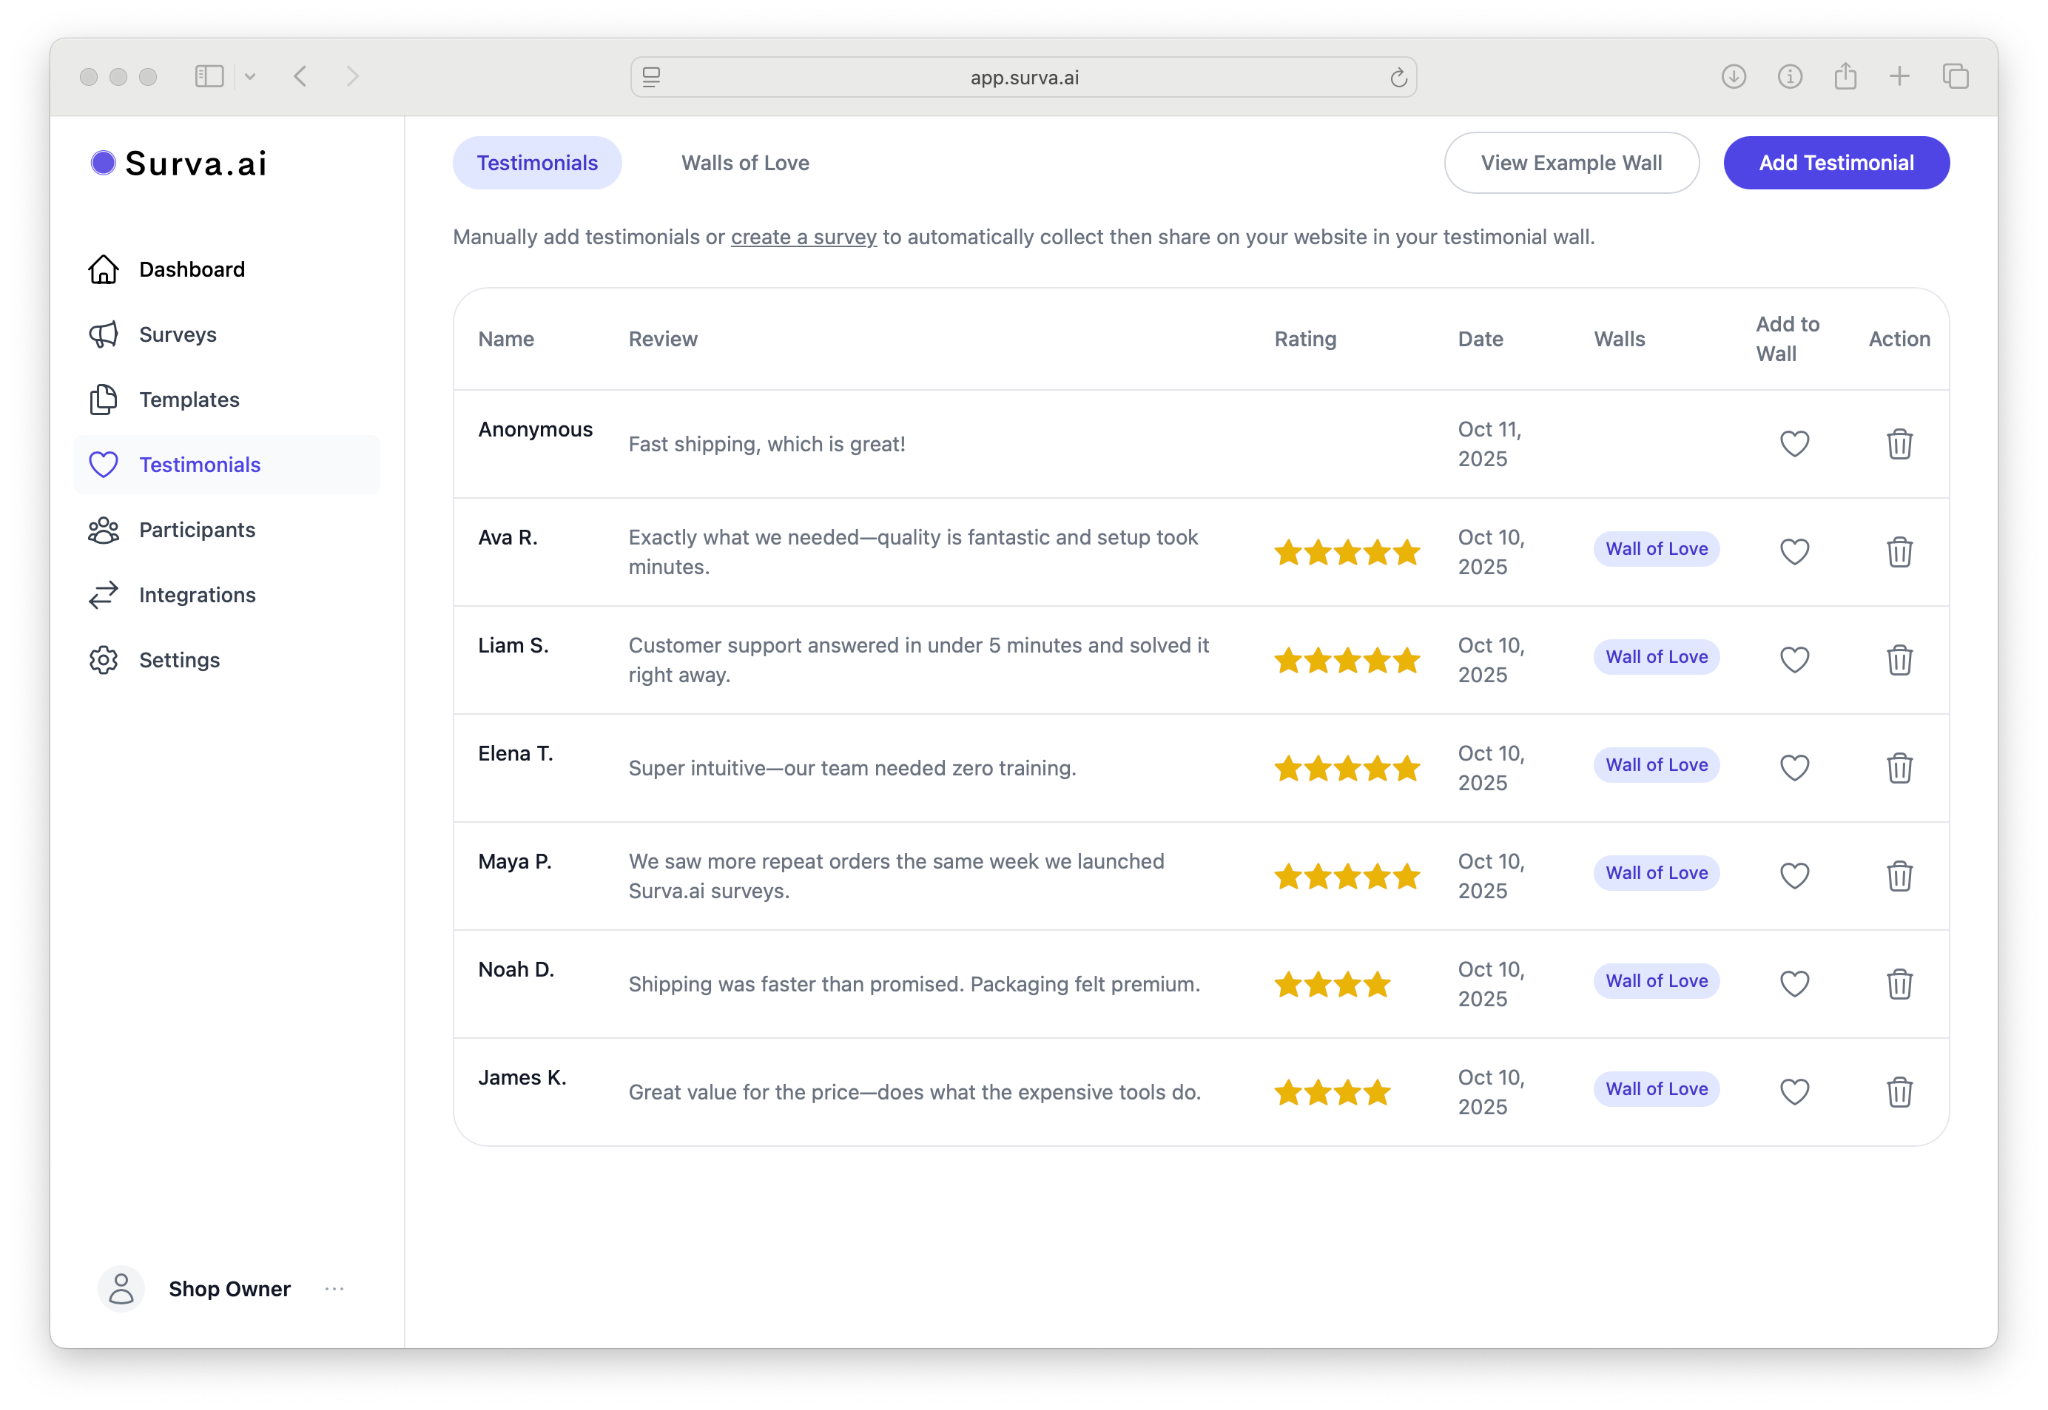
Before you create a Wall of Love, make sure you have at least a few testimonials in your Surva.ai account. Testimonials are created automatically when customers leave positive feedback through your surveys. To check for existing testimonials, go to the left-hand navigation menu and click Testimonials. This page lists all testimonials that have been received or added directly into Surva.ai.
There are a couple ways to collect testimonials with Surva.ai. The easiest way is to create a Testimonial survey using our Testimonials Template. Simply click on the Templates link in the lefthand navigation in your dashboard and choose Testimonials as the template type.
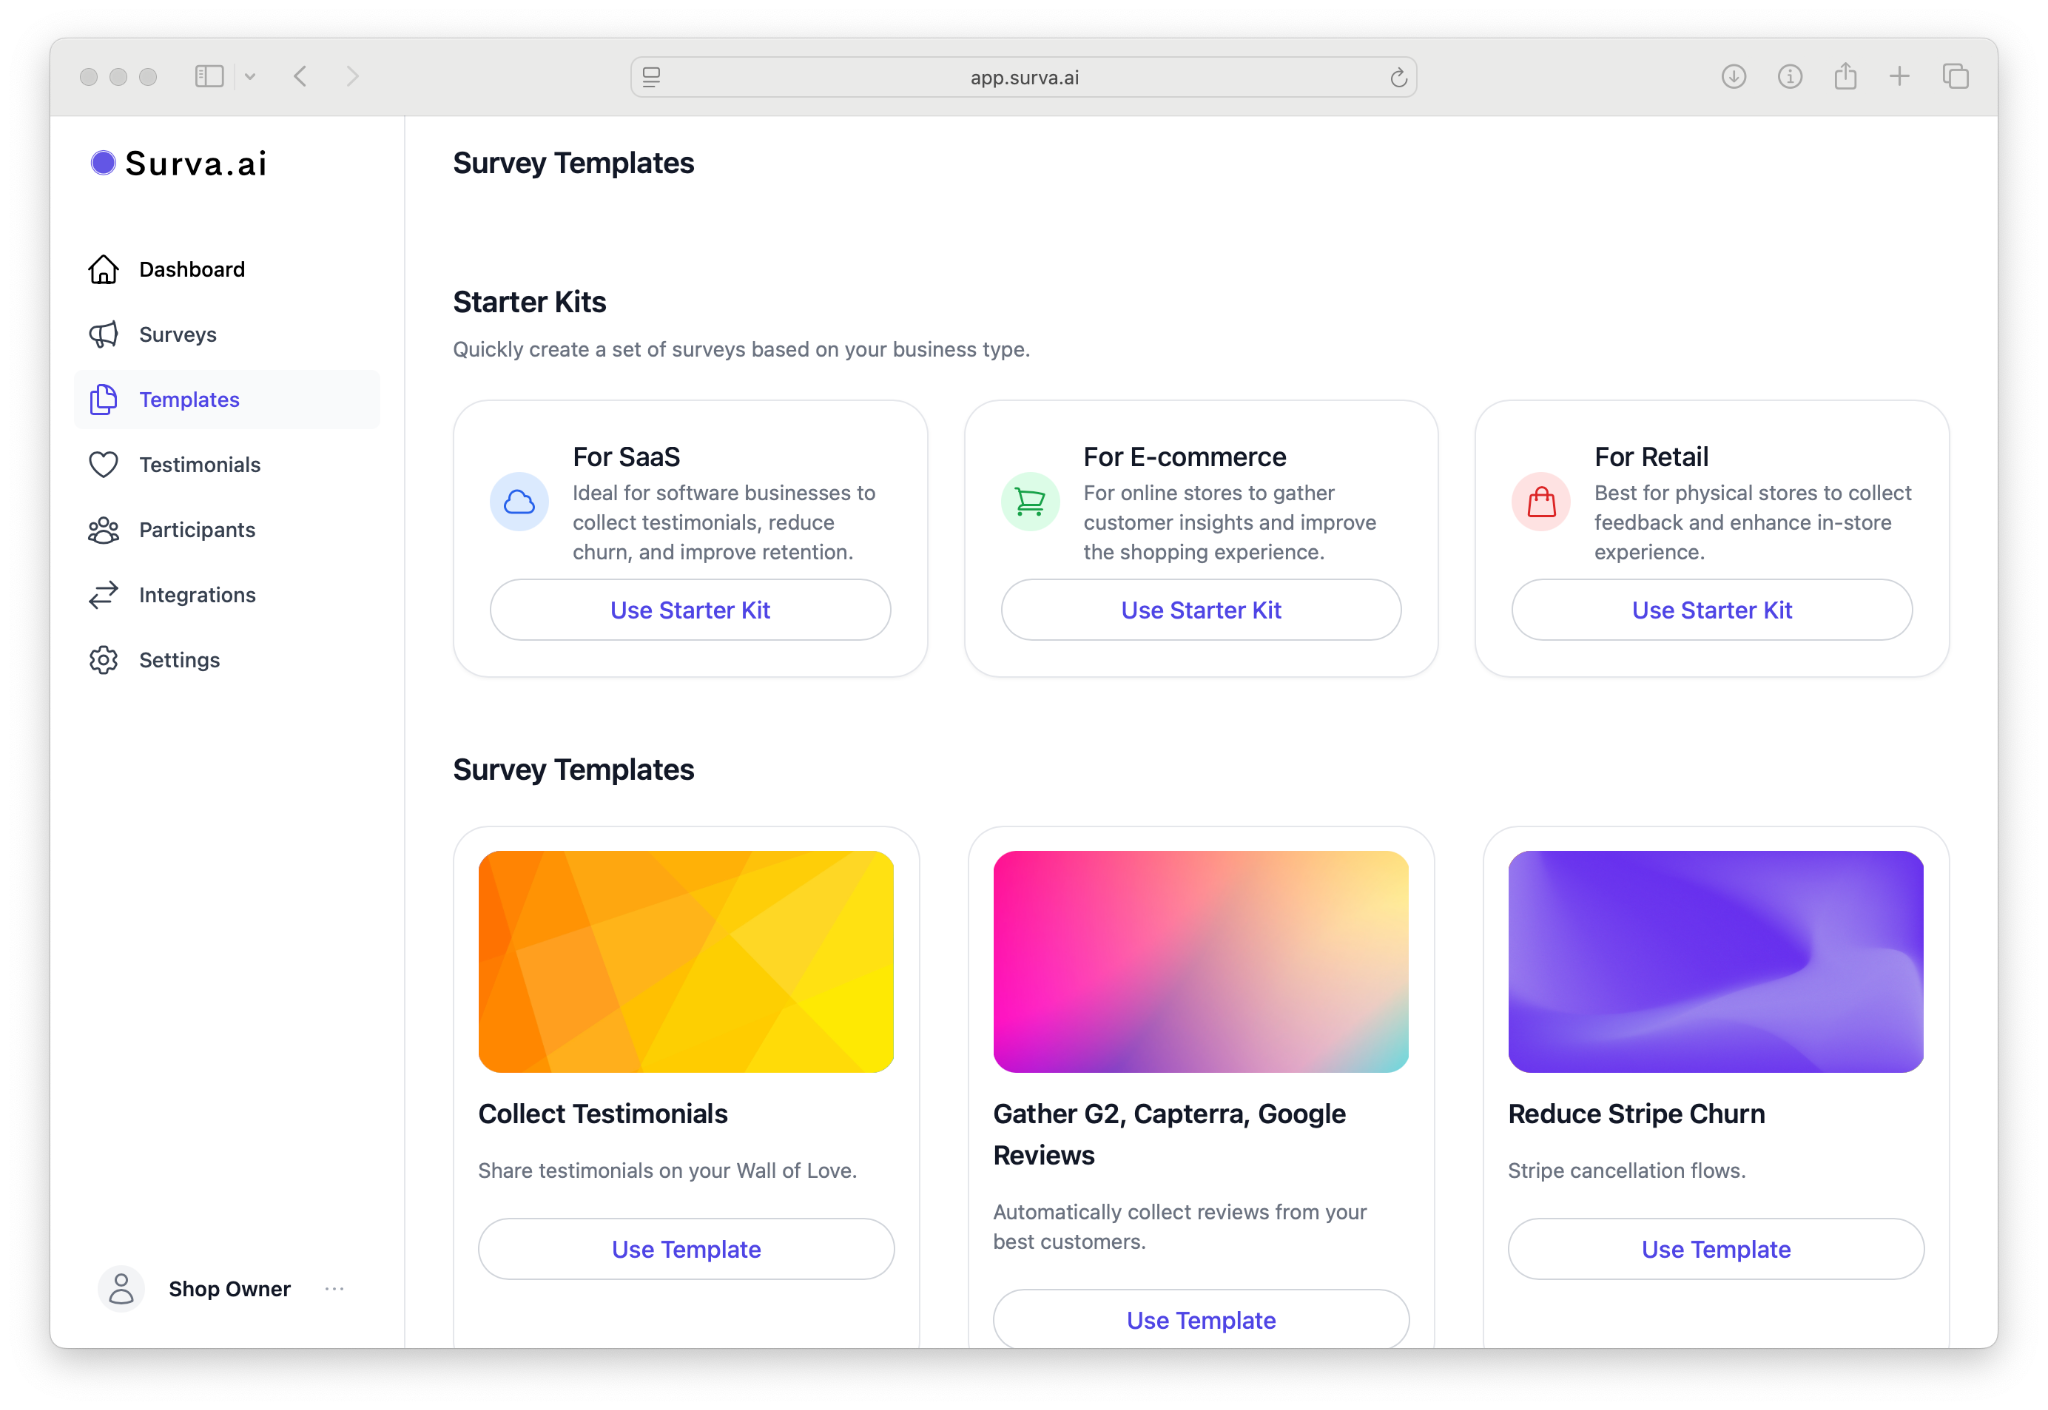
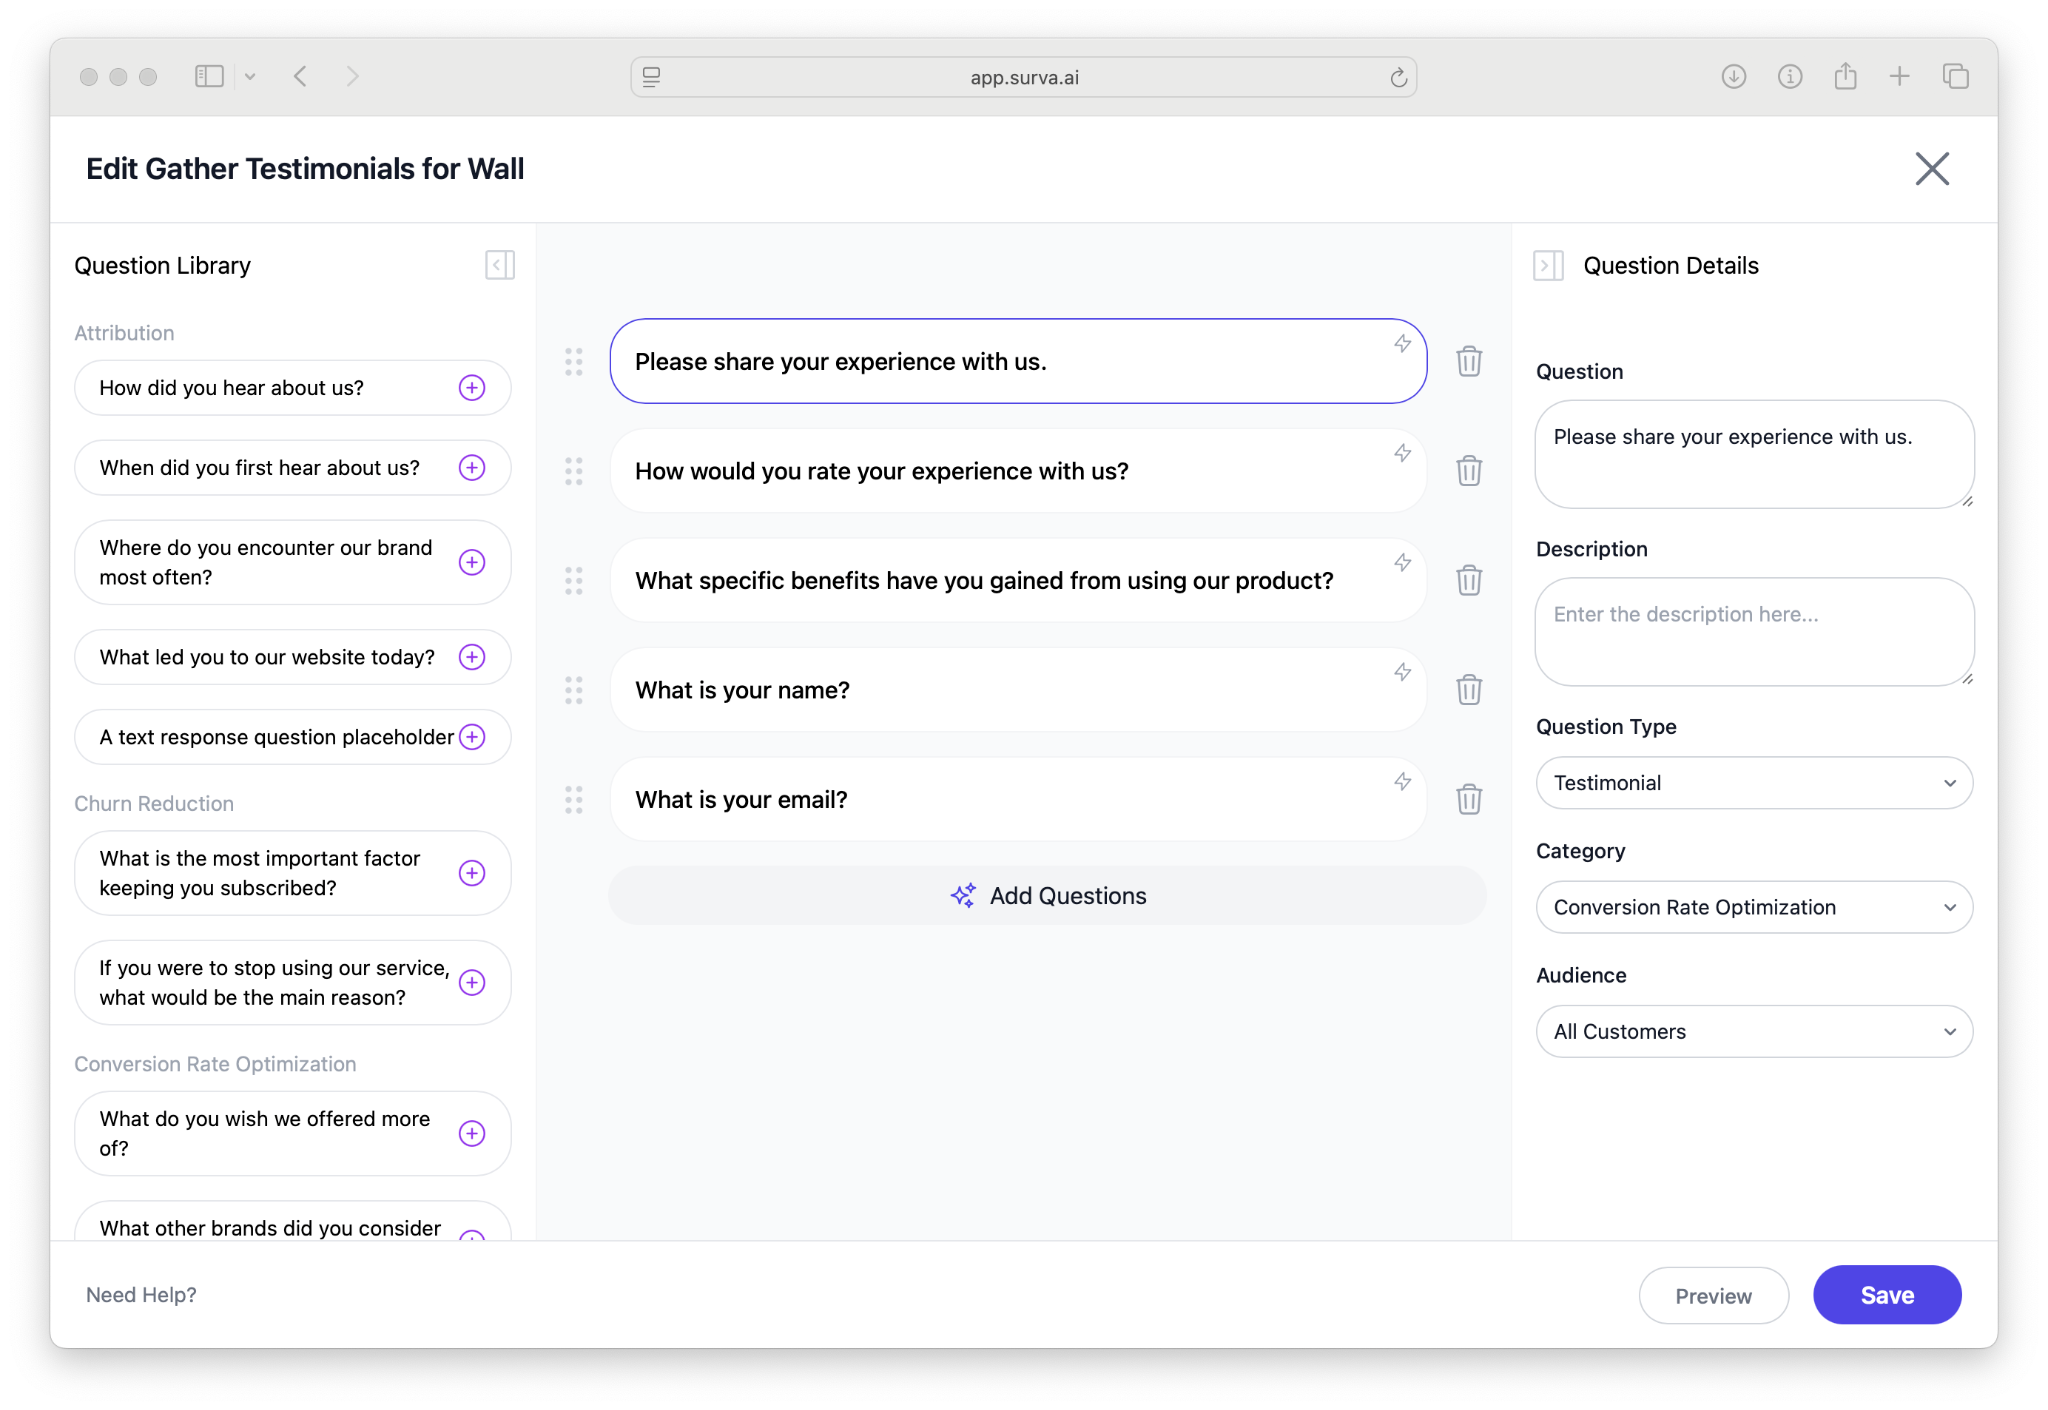
Once you select this template, we’ll create a survey flow that includes a question type of Testimonial.
Once this survey is created you can share it via a link, by sending an email, by embedding the survey as a widget on your website, or by triggering the sending of the survey transactionally using our Surva.ai Developer API. So after a good chat interaction, you could implement a trigger that sends the testimonial request.
You can also manually add a testimonial at any time by selecting Add Testimonial in the upper-right corner and filling out the name, quote, and optional image fields.
Step 2. Create a New Wall
Now that you have some testimonials to show off, head to the Walls of Love tab at the top of the Testimonials link.
We automatically create a default Wall for you when you sign up so you can add your testimonials here or create a New Wall. This is handy if you have different websites or different brands that you’d like to share testimonials across.
To create a new Wall of Love, Click Create Wall in the top right. Enter a descriptive name for your wall, such as “Customer Success Stories” or “Shopify Reviews.” You can also add an optional subtitle that appears below the main title on your wall. Select which testimonials to include by selecting the Add Testimonials button in your Wall Settings. You’ll notice for the default wall, that we’ve pre-seeded the wall with some bogus testimonials. Remove these before publishing your wall to your website.
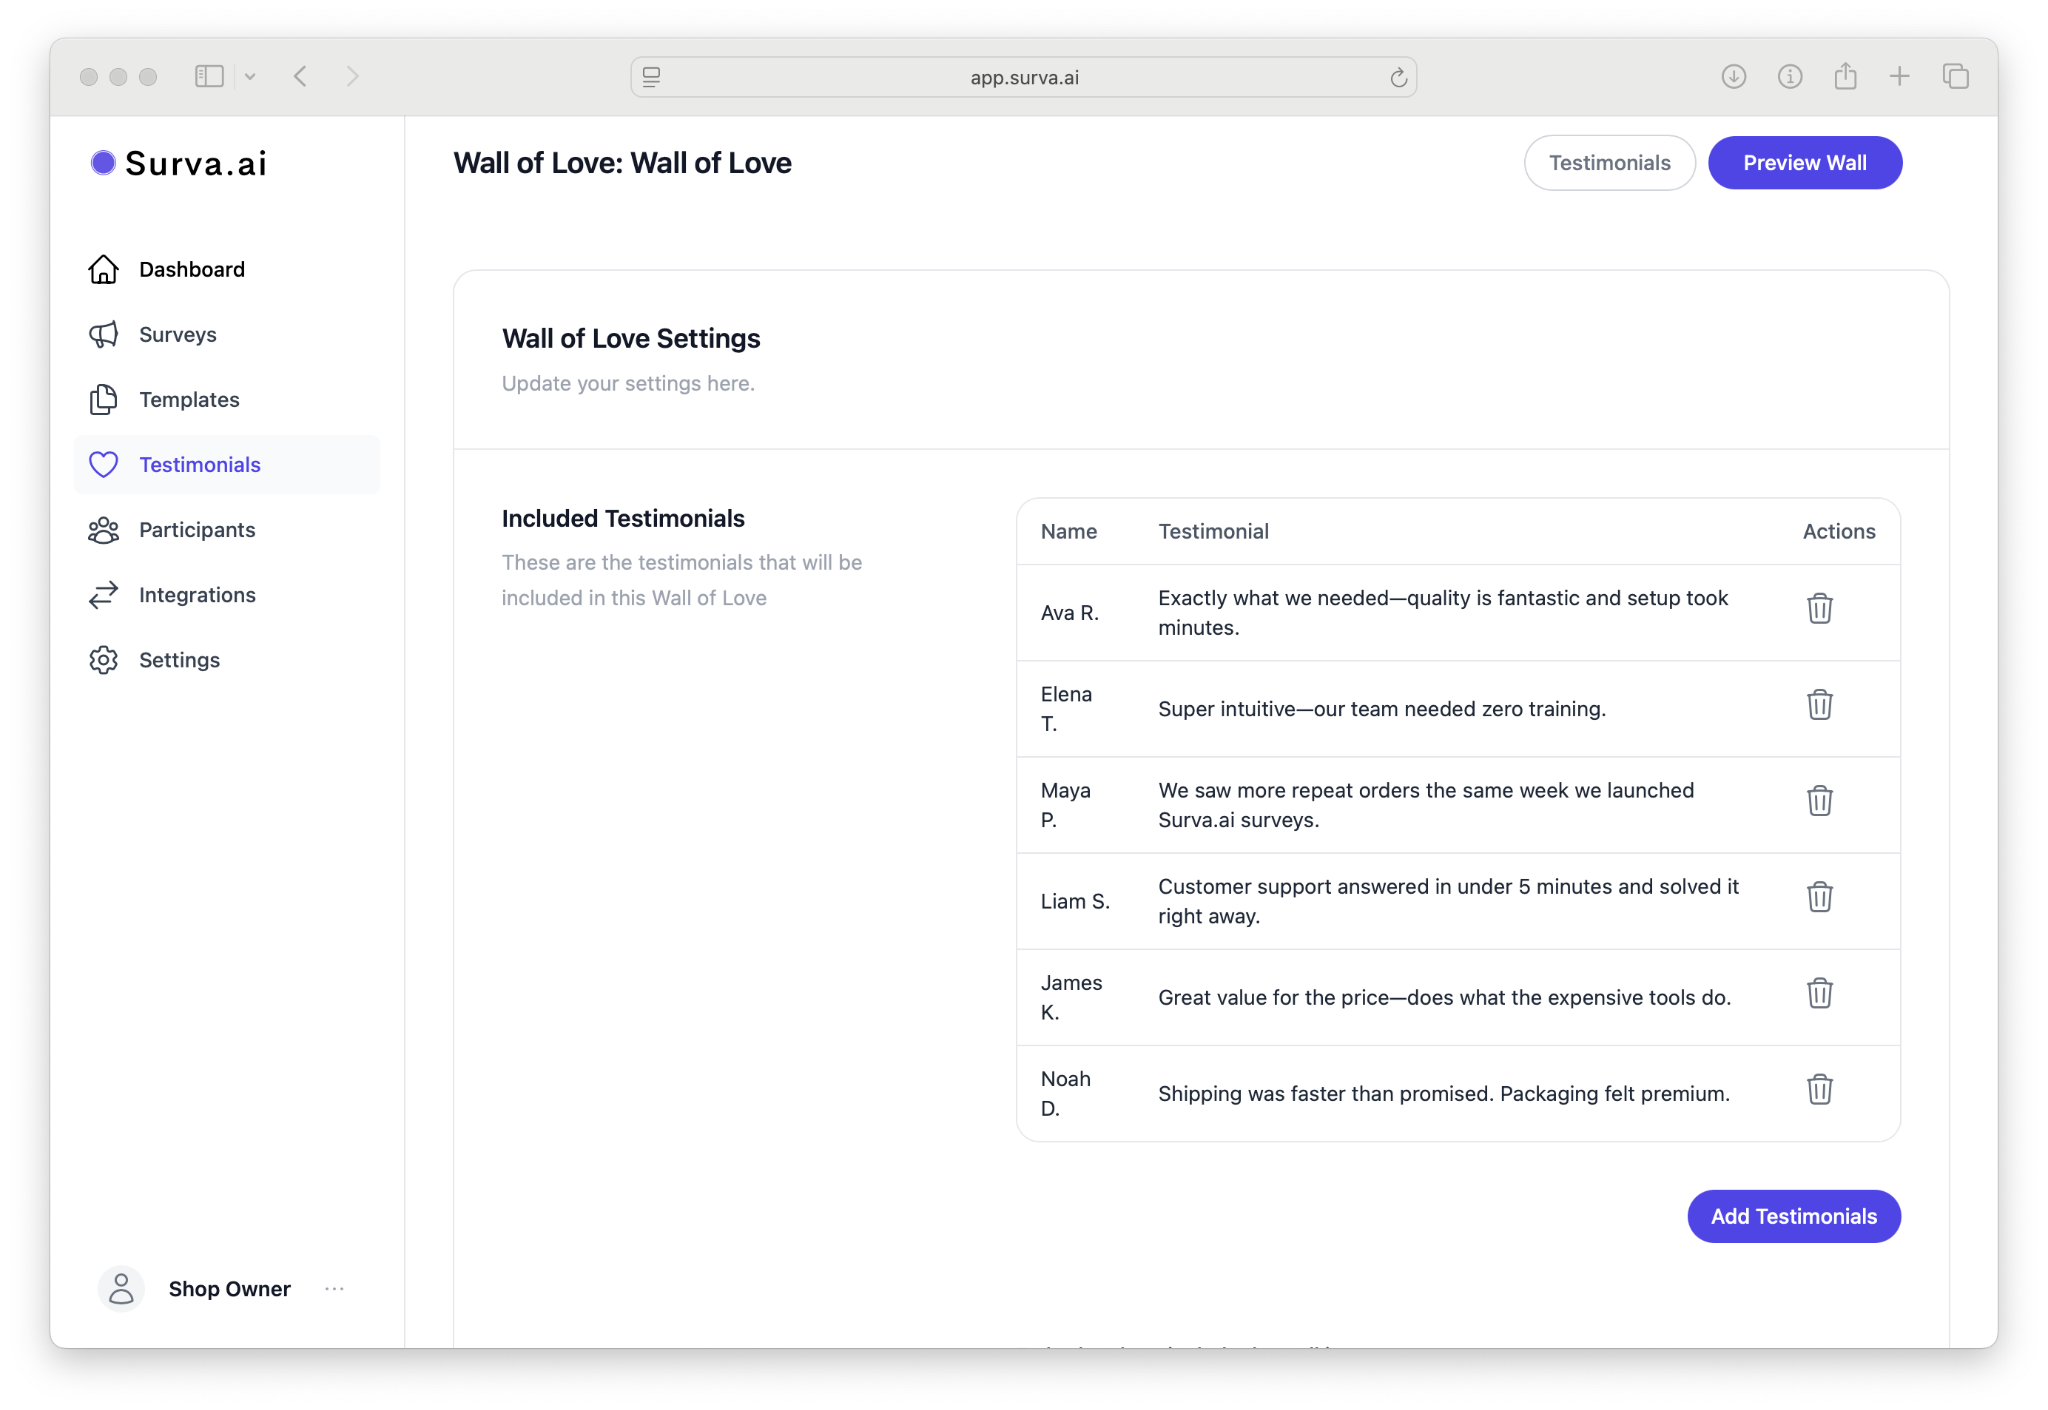
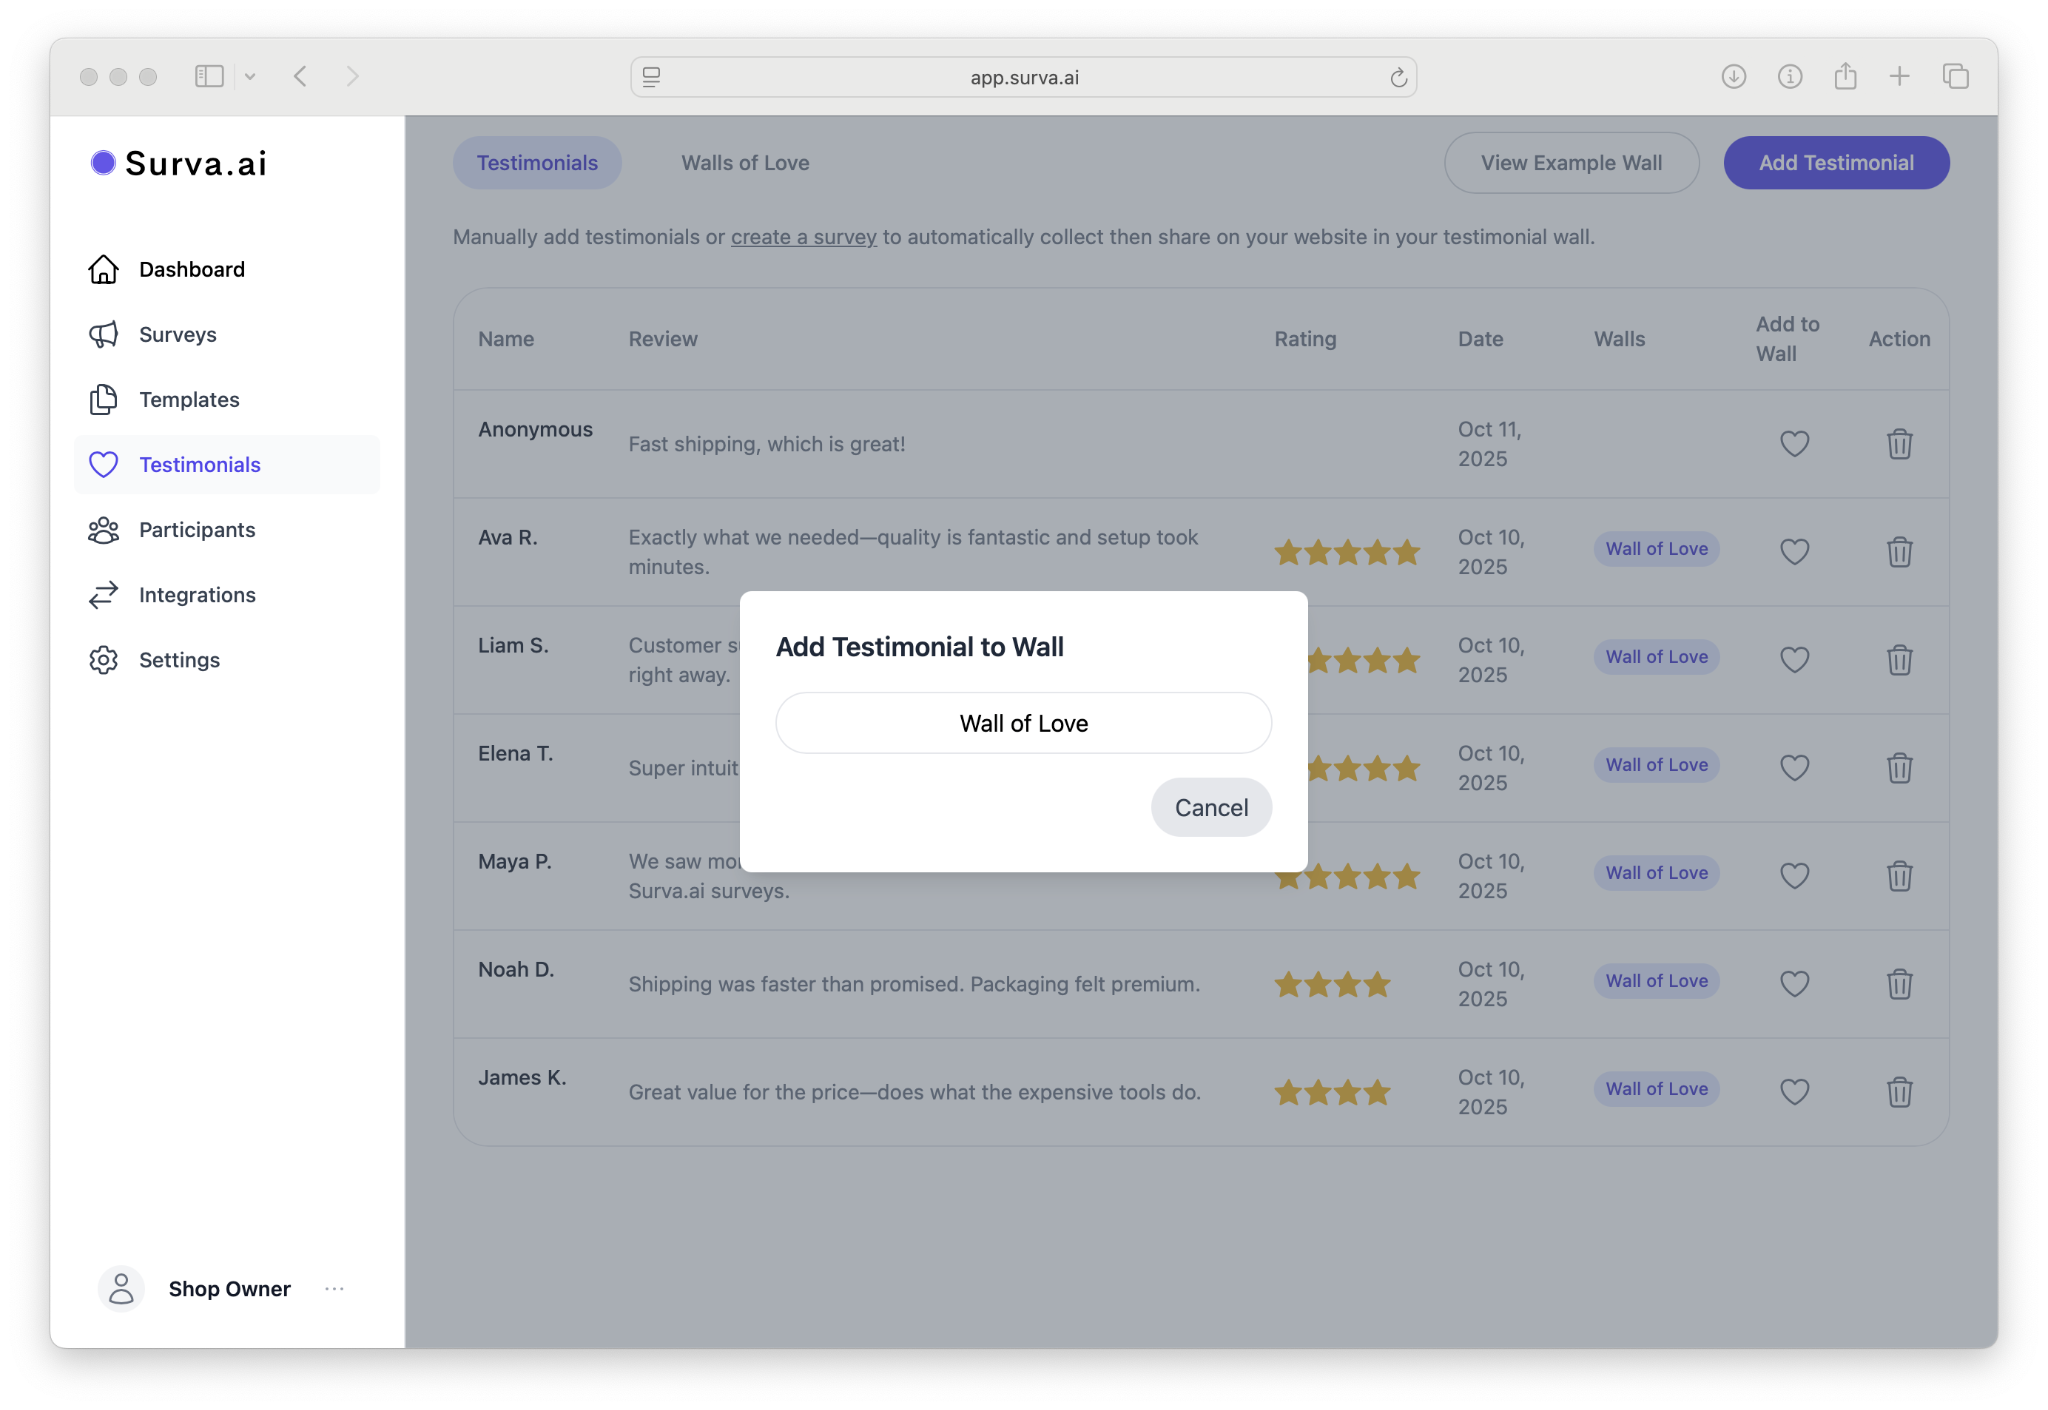
Next to each Testimonial there is an Add to Wall heart icon - click this and choose the wall that you’d like to add the Testimonial to.
Now you have your testimonials to show off in your Wall of Love.
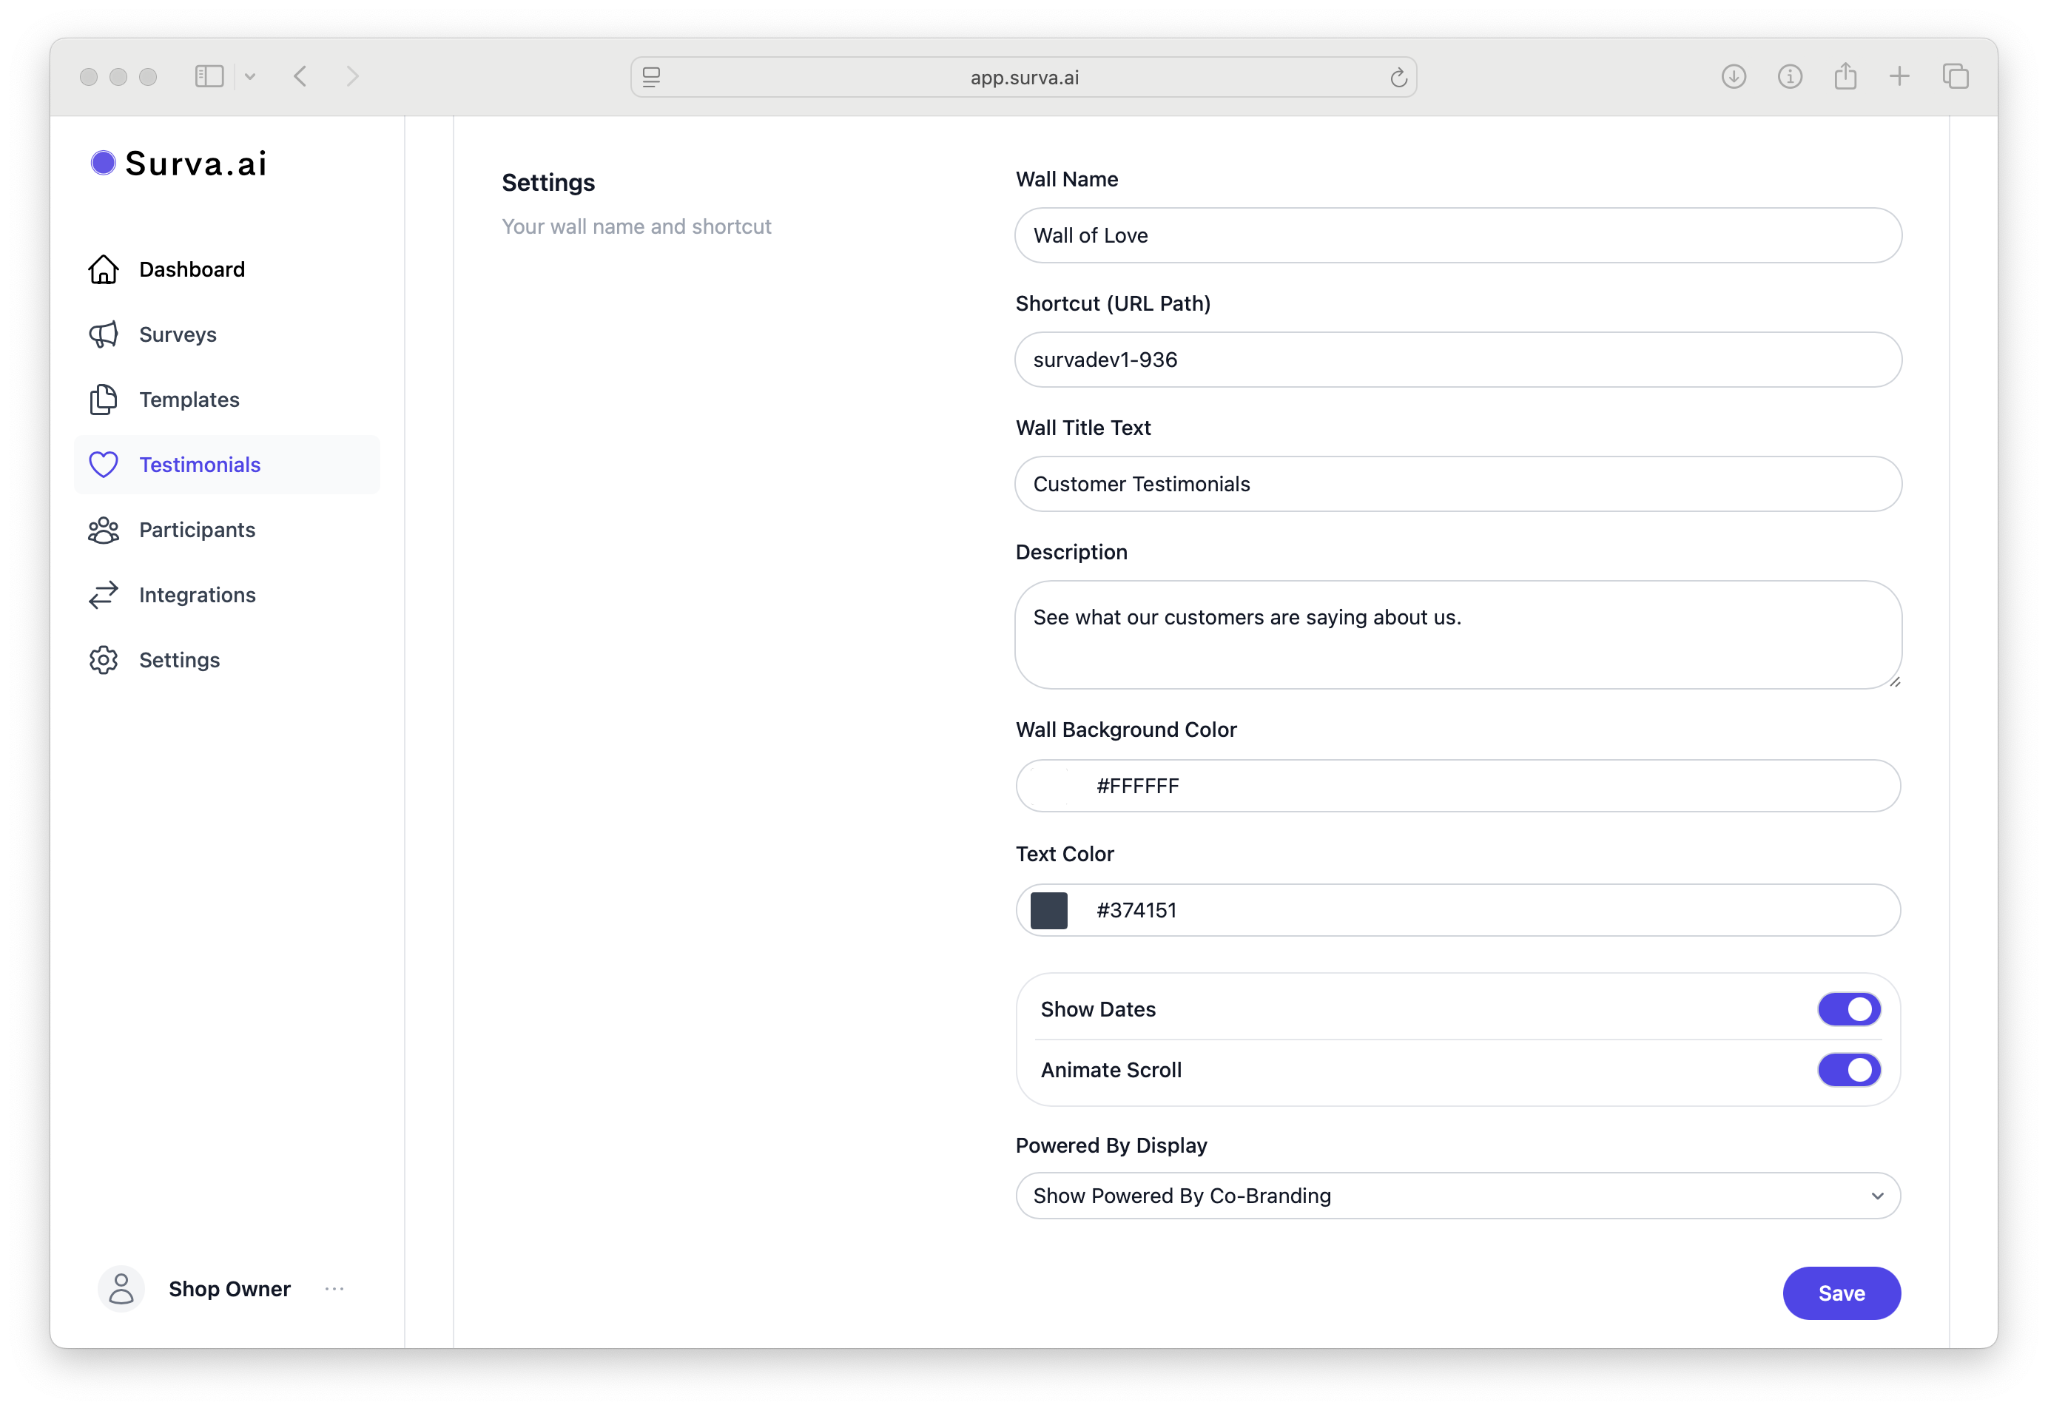
Step 3. Customize Layout and Design
After creating your wall, you’ll be taken to the Wall settings. Here you can customize your wall shortcut for linking directly, your Title and Description, colors, and scrolling options.
Step 4. Publish and Embed
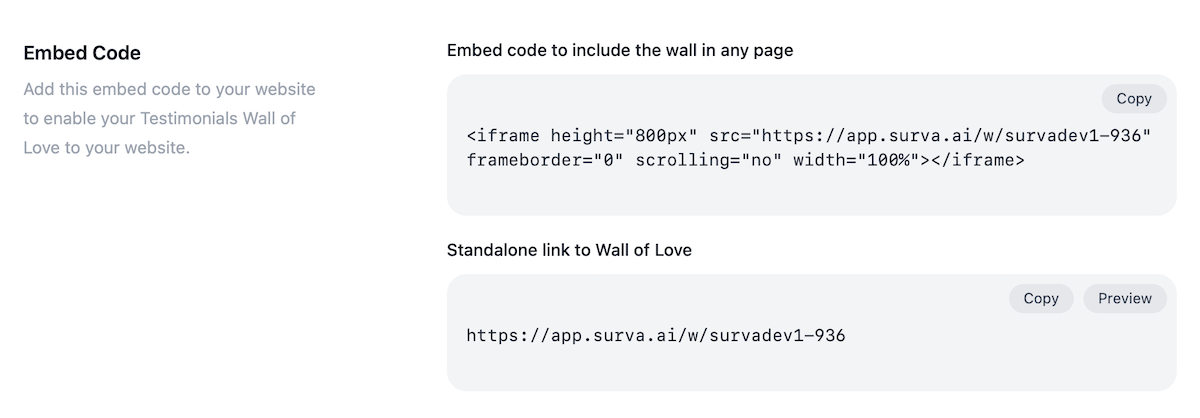
When your wall is ready to share, click the Preview Wall button at the top. This will link to your standalone Wall of Love. This public page link is a hosted version you can share directly in social media, website, or iframes.
To embed your Wall of Love on your own website or Shopify store, copy the provided script tag and paste it into your site’s HTML where you want it to appear. The embed automatically adjusts to your site’s layout and inherits your brand styling.
Step 5. Keep It Updated
You can edit your wall at any time. From the Walls of Love page, select your wall and open the settings to add or remove testimonials. Approve new testimonials to add to your wall at any time. This gives you the ability to quickly audit the type of reviews that you are publishing.
Best Practices
- Use a clear title and short intro sentence to describe what your customers are saying about your brand.
- Keep the design consistent with your website’s colors and typography for a seamless look.
- Feature a mix of short quotes and longer testimonials for variety.
- Periodically review testimonials to ensure they remain relevant and up to date.
Troubleshooting
If your wall does not display on your website, confirm that the embed code is placed within your page body and not inside a script-blocking section. If a testimonial does not appear, verify that it has been approved under the Wall of Love - Included Testimonials section. For design issues, recheck your saved theme under Design to ensure no conflicting CSS from your website is overriding it.
What’s Next
Once your Wall of Love is live, you can promote it across your website, social channels, and emails. To continue building social proof, read Sending Surveys Automatically After Purchase to generate new testimonials from recent buyers or Capturing Google, G2, and Capterra Reviews for expanding your online reputation.